How To Create Digital Invitations With JoinMyMoment

Planning an event? Whether it’s a birthday, wedding, graduation, or any celebration, digital invitations are the easiest way to invite your guests and make a lasting impression. In this guide, we’ll walk you through how to create beautiful digital online invitations using JoinMyMoment, a modern platform that makes event planning and sharing moments easy, social, and fun.
Let’s go step by step so you can set up your event in just minutes!
Step 1: Create a Free Account with JoinMyMoment
Start by going to JoinMyMoment.com and creating a free account. You can sign up quickly using your email address or simply sign in with your Google account for even faster access. No need for complicated setups—you're ready to go in seconds.
Step 2: Add Your Event Details
Once you're logged in, it's time to create your first Moment—that’s what JoinMyMoment calls each event.
Fill in the key information for creating a new Moment:
- Event name (birthday party, graduation, wedding, etc.)
- Event start & end date and time
- Number of guests
- Any other relevant details
This is your event’s core information, and it’s what your guests will see when they receive your digital invitation link. You can always edit it later, after you already created the Moment.
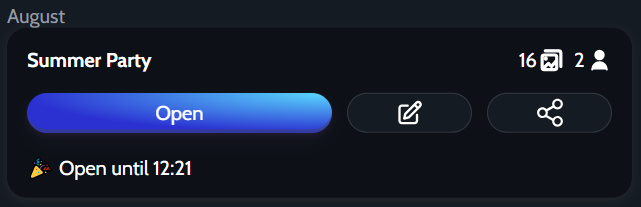
Step 3: Access and Manage Your Moment
After you’ve created your Moment, you’ll find it in the “Moments”. From here, click on it, and you can:
- Edit any of the event details if plans change
- Share your Moment via a custom link or QR code
These sharing tools make it super simple to send out your online event invitations by text, email, or social media.
Step 4: Create Your Digital Invitation Design
Next, you’ll want to design your invitation image. We recommend using Canva, a free and beginner-friendly design platform.
- Browse from hundreds of free digital invitation templates
- Customize with your event name, date, and personal flair
- Download your final design as an image file (JPEG or PNG)
This image will become the cover image for your JoinMyMoment event, giving it a polished and professional look.
Step 5: Add Your Invitation as a Cover Image
Now it’s time to personalize your Moment.
- Go back to the “Moments” tab and find your event
- Click to edit your Moment
- In the edit menu, look for “Upload” cover image
- Upload your invitation image and click Save
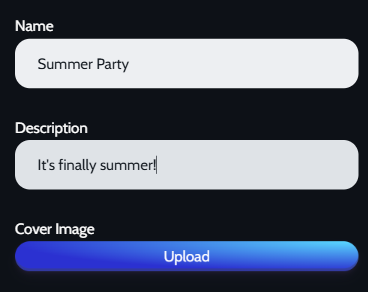
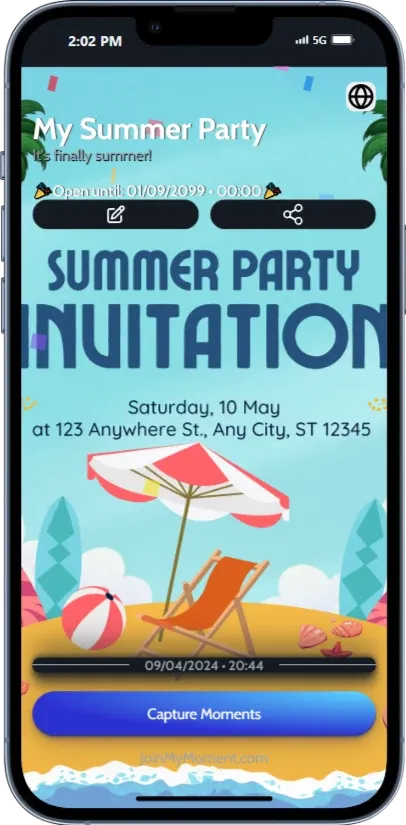
Congratulations! Your Moment now has a beautiful digital invitation cover image that your guests will see first when they access the link or QR code.
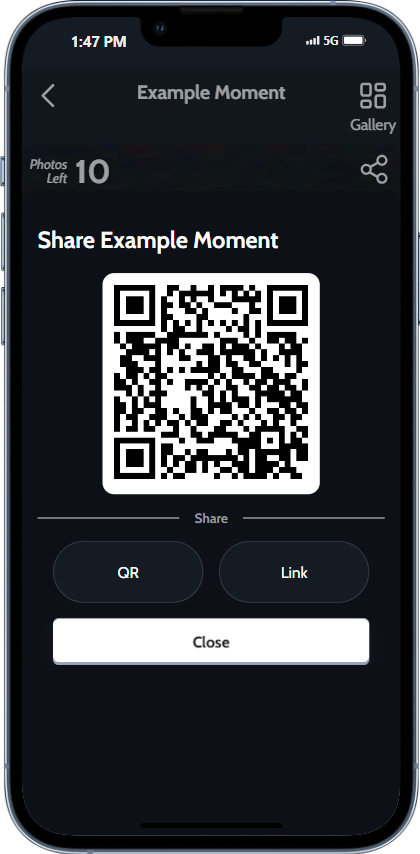
Step 6: Share Your Moment
Now that your Moment looks great, it’s time to share it!
Send out your event link or QR code to your guest list. When they open it, they’ll see your custom invitation image—even before the event starts. Plus, during your event, they can:
- View event details
- Snap and upload photos from their point of view
- Enjoy a shared digital space for memories
Final Thoughts
Creating and sharing digital invitations online has never been easier with JoinMyMoment. It combines the convenience of modern tech with the personal touch of a beautifully designed invite. Whether you're planning a birthday bash or a once-in-a-lifetime wedding, JoinMyMoment helps you bring guests together—before, during, and after the big day.
Try JoinMyMoment today and elevate your event with a stylish, sharable digital invitation.